Garden wildlife photo tips
Club magazine expert David Chapman explains how to capture some stunning images

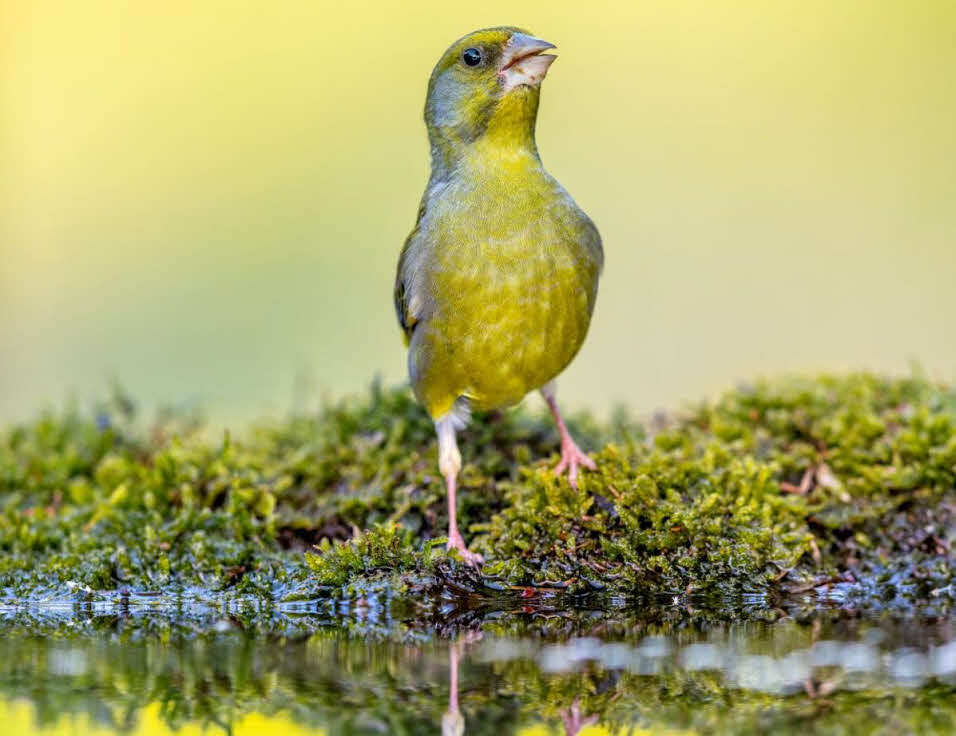
A greenfinch prepares to take a dip Credit: David Chapman
As I write this article I have no way of telling what the situation will be regarding travel around the UK, but by the time you read it you could still be spending more time at home than usual. You might be getting short of ideas for things to do – the good news is that if you have a garden, love birds and like taking photos, I have an idea for a project which could occupy you for months!
A few years ago in Country Matters, I briefly mentioned a technique I use when I want to take photographs of birds bathing and drinking. It has brought me so much pleasure over the years, and now seems like a good time to expand on it.
I started photographing birds at a standard, pedestal-mounted bird bath and enjoyed it – but the shots didn’t look natural so I switched my attention to the garden pond. This setting was certainly better but too often the direction of light wasn’t ideal and I couldn’t get the low angle of view that I wanted, which led to messy backgrounds and a less intimate image.
On reflection, if you will excuse the pun, I liked the fact that by using my pedestal-mounted bird bath I could get eye-level with the subject while sitting comfortably in a seat. The fact that I could move the bird bath around also gave me some control over light angles and the configuration of the background from the window of my house. So I began to develop the ‘bird photographer’s bird bath’, a hybrid between a pond and a normal bird bath. If you would like to make your own, simply follow the instructions at the bottom of this article.
Bath times
It might take a while for the birds to get used to the new bath – I found that by placing feeders nearby I could encourage them to show more of an interest. Over a period of time you will learn at what time of day the greatest activity occurs - it will then be possible to adjust the position of the bath to create the optimum angle of light. Generally it is best to have the sun behind you, or at least partly behind you, when taking photos.
When positioning the bird bath, try to get as much distance between the bath and the background as you can. The effect of this will only become clear when reviewing the photos, but basically the greater that distance the more out of focus the background will be.
Exposure settings
Exposure settings will also have some impact on how the photos look, but in reality we don’t have many choices to make. The birds will be coming down to drink and bathe, both of which involve action, so the priority is to use a fast shutter speed. If you are confident with camera settings, you might want to set the camera to ‘manual exposure’ and make all the choices yourself; if not either set your camera to ‘sport-mode’ (for bridge camera-users) or try the following steps if you use a mirrorless or DSLR camera.
1. Set your camera to ‘shutter priority’ (denoted by ‘TV’ for time-value)
2. Choose a shutter speed of 1/1000th of a second (you might vary this according to the speed of the action and the desired effect)
3. Set your camera to auto-ISO (doing this will allow the camera to increase the ISO if it gets darker; remember that a high ISO means more grain in the image)
4. I usually like to make my photos a little darker to avoid losing detail in the white feathers of birds, so try setting the exposure compensation (the +/- button) to ‘-1’, or thereabouts; this is particularly important when it is sunny
Check out this helpful introduction on wildlife photography for more information on camera equipment, lenses, as well as 15 tips for photographing wildlife.
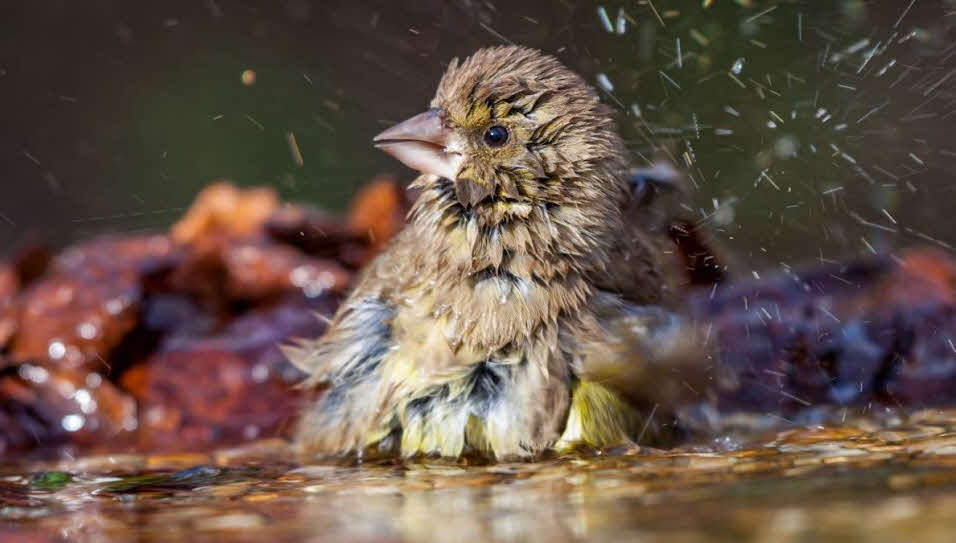
 Select a high shutter speed for action shots Credit: David Chapman
Summer is a great time for activity at bird baths because birds need more water when it’s warm and dry (I am making many assumptions about the British summer). As a rule, the hotter and drier the weather, the more birds will visit.
Whether I am taking photos or just sitting and watching, I love the feeling of intimacy created by having birds behaving totally naturally just a few feet away from me. As I look through the camera and see the action magnified, picking out every feather detail and a glint in the eye of the bird, I get a feeling of excitement and a rush of adrenaline. Then, finally, I review the photos. Yes, I have to hit the delete button a few times but there is the odd occasion when an image lives up to my expectations and that is the icing on the cake.

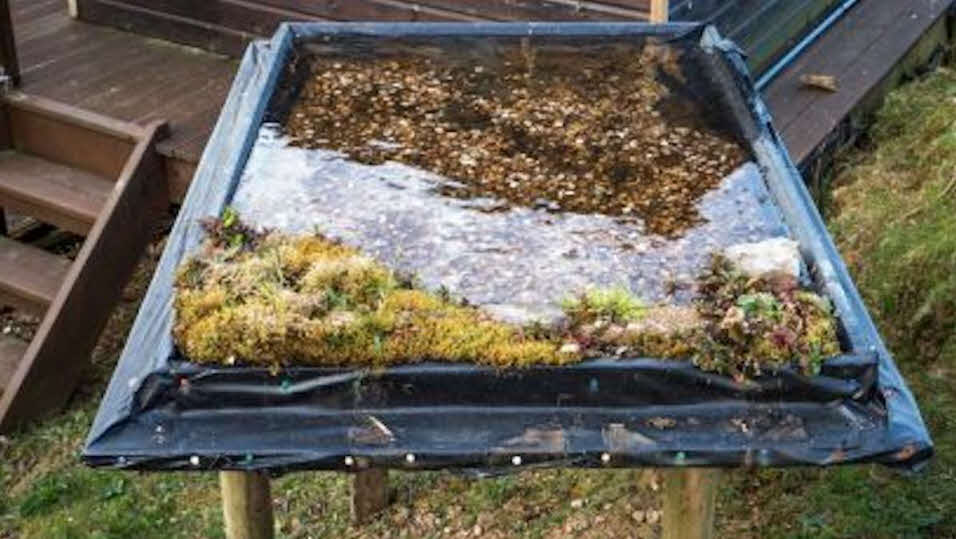
Decorate one end of the bath with shingle or mosses Credit: David Chapman
How to make a bird bath
1. Save an old table destined for the tip, or find a sheet of plywood and attach legs
2. Put lengths of wood on top along the edges to form a ‘bath’
3. Line with pond liner, stapling underneath the edges of the table
4. Decorate one end of the ‘bath’ with shingle, stones, bark, mosses or small plants


